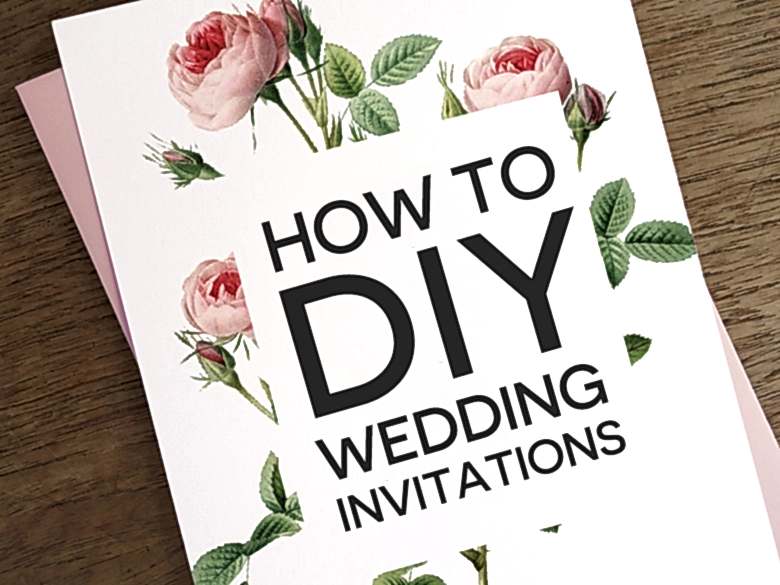
As a graphic designer and someone who pulled out all the stops designing her own wedding invitations, believe me when I say you can make DIY wedding invitations as simple or as complicated as you want. A lot of people go into making their own invitations hoping to save money, but I’ll tell you up front: there are plenty of affordable places to get nice invites with less work than it will take you to DIY wedding invitations. However, if you have specific reasons to go DIY on your paper (like, you want to bring your specific idea to life, or you want to get creative) read on. (Fun fact: Every APW editor DIYed their wedding invitations, so we’ve got your back here.)
Printing Options For DIY Wedding INVITATIONS
There’s huge variety when it comes to the execution of DIY wedding invitations these days, so before you start buying paper or ink, you need to think about the final form of your invite: how will it look, and what process do you want to use to make it? Here are just a few options, and their pros and cons.
Related: Wedding Invitation Wording Samples (For Real Life)
Letterpress: The designer and paper lover’s dream, letterpress is visually lovely and highly coveted all over Pinterest. However, it is expensive because it is a fine art that requires some heavy machinery. Letterpress is the option to use when you want to support the artists making it, not because you think you should. Thomas Printers is a great option for people looking for letterpress invites on a reasonable budget. The other option to letterpress is to build your own, but you better have a serious love for the actual craft. The majority of your guests, sadly, won’t know or won’t care that your invites are letterpressed.
ONLINE PRINTING: There’s a pretty wide variety when it comes printing via online companies, so always make sure you can get a proof of your invitation. With some companies, that may cost extra, but it’s usually not very much. Much like with at-home printing, your paper options will usually be limited to whatever the company carries, and each company’s paper set is going to be slightly different. You can usually request paper samples for free. Here are a few companies I’ve used with good results:
AT-HOME PRINTING: By far the most accessible, this is easiest option for tackling the project in smaller chunks on weeknights rather than spending hours in a studio or waiting at a print shop. However, you should test paper before buying a ton of it, printers can be especially finicky, and your can’t exactly change the ink your printer uses. If your printer isn’t higher end, you may have very limited paper options. Here’s a little more on at-home printing.
LOCAL PRINTING: When it comes to short run printing, the local option is my favorite option. Local print shops may not be able to match the price of many online vendors, but you get to have more of a hand in the process, and therefore a little more control over the end result. Some will even let you bring in your own paper, and most will let you use their paper cutters for free (sometimes even if you haven’t printed anything through them). Unfortunately, not all local shops are created equal—some FedEx Office shops are great, others not so much. You’ll need to do your due diligence to find a good match. InkerLinker is also a good place to find amazing, non-FedEx print shops near you.
GOCCO: Gocco printing is a pretty, small-scale version of screen printing, which is why the Internet loves it so much. However, gocco is also an almost entirely dead art at this point, so if you’re taking it up simply for your invitation printing… maybe step back from the Internet for a week, and then decide. (Editor’s note: Both Meg and Maddie did this and… uh… probably wouldn’t advise it to anyone.) You can look up screen printers in your area for a similar style of printing, but it’s a pricier option, much like letterpress.
Design Tips (And Options) For DIY Wedding INVITATIONS
Now that you’ve covered how you’ll be printing or creating your invite, let’s talk about how you’ll put your information together in a pretty way.
Designing Your Own: If you’re choosing to design your own DIY wedding invitations, you probably have a good idea of what you’re hoping it will look like. You might even have a grasp of some of the skills you’ll be bringing to the table to make that vision a reality. Or, you’re hoping to learn a little more about the process and designing in general. Or maybe you just want to get a little crafty. All of these reasons, and more, are good reasons to do your own invites. We’ve got a whole bunch of extra tutorials, in case you want to brush up on a few skills before you put proverbial pen to paper.
- Understanding layout styles
- A guide to programs for designing your invites
- An introduction to typography
- Wedding invitation wording samples
Buying/Finding A Design: If you don’t have design experience, and you’re not fond of pushing images and text around on pages (aka, does the idea of designing a flyer for a Bake Sale or some other event excite you, or does it make you hide under your desk?), you’re going to need to find someone to design your DIY wedding invitations for you. Fear not! Thanks to the Internet (and Etsy, bless), there are tons of places to get an invitation design. Some are even our sponsors! Here’s a short list of places to check out.
Paper Choices For DIY WEdding INVITATIONS
There’s enough variety in paper types, weights, and finishes to make your head spin and keep you busy for weeks. Here’s the basics on what you need to know for choosing what paper you’ll print your DIY wedding invitations on.
Finish: Your paper finish will affect how you’re able to print and how much ink your invitation will take. Glossy papers take a lot more ink and longer to dry. Linen papers and papers with more texture have a much higher tendency to bleed, and so they won’t work with some at-home printers where you can’t change your ink settings. If you’re not interested in researching finishes because you’re not a weird nerd (like myself) who likes to feel on paper, a matte card stock is an easy, relatively foolproof option that will more than likely work for the printer you’re using.
Weight: Paper thickness is measured by weight. The higher number you see, in pounds, on the packaging label, the thicker your paper is. This doesn’t mean you have to find the thickest paper you can—most card stocks are a great weight for invitations and can hold up to being mailed.
If you’re buying your own paper, you can find a good selection at local office shops when it comes to card stocks and glossy photo paper. However, if you’re looking for linens or specialty papers, you may have to go online. Always get a sample before buying a huge stack of paper, and do a test print, to make sure that whoever or where ever you’re printing from can actually use the paper you’ve selected with your design and medium. Here are a few other places to buy paper from.
Tips For PUTTING IT ALL TOGETHER
Paper cutting: The Internet loves to tell you that if you are doing your own DIY wedding invitations, you need to invest in a professional paper cutter, or at least a rotary cutter, along with a tape gun, and the list goes on. You can skip this by ordering paper that’s cut to size—always double check to make sure you can print said format of course—and skipping any taped on embellishments. I promise, a fancy invitation need not have three layers of cardstock and the ability to stand on its own.
However, if a paper cutter sounds like a useful thing that has a place in your office, buy it! You don’t need to shell out $100 for a good one. This $25 trimmer has been a great little workhorse for me for about four years now, through invitations, photo albums, and many, many other late night print jobs.
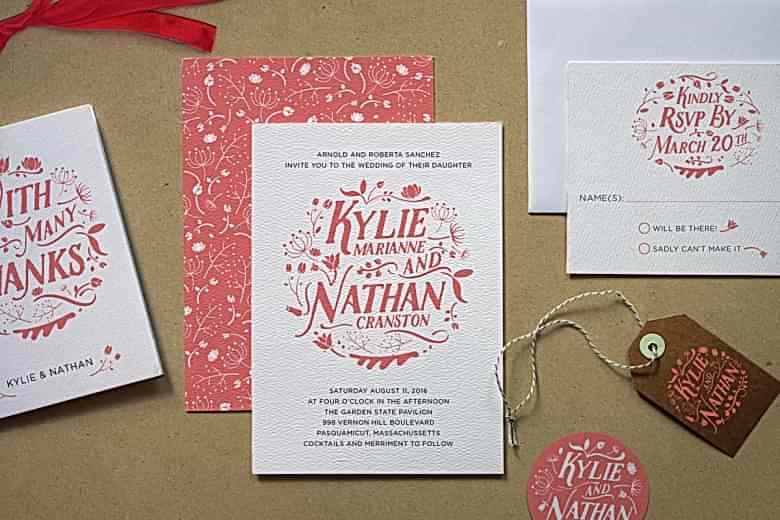
Packaging And Embellishments: If you’re adding embellishments, or you’re mailing more than just an invite plus an RSVP card (we opted to mail more info, because of the destination aspect), keep track of the weight of your invitation suite once it’s all packed up. Depending on its size, you may be facing more postage fees than a simple stamp will cover. You can get a postage estimate using a kitchen scale and checking on the USPS website. Through the USPS website I also learned that square invites and envelopes cost more in postage, by a significant amount. It’s not worth it.
ADDRESSES: You can choose to address your invitations by hand, or you can decide to print labels. Don’t let the WIC bully you into thinking your own handwriting isn’t good enough, or that the convenience of labels is tacky. As for the actual addresses, here are a few tips on how to address invitations formally, accounting for a whole host of last name conventions.
POSTAGE and Quantities: The number one tip you need when it comes to sending out your invites, is that your guest list number does not equal the number of invites your sending. Do the math on how many couples you have ahead of time, and you won’t make the common mistake of ordering about double the invites you need.
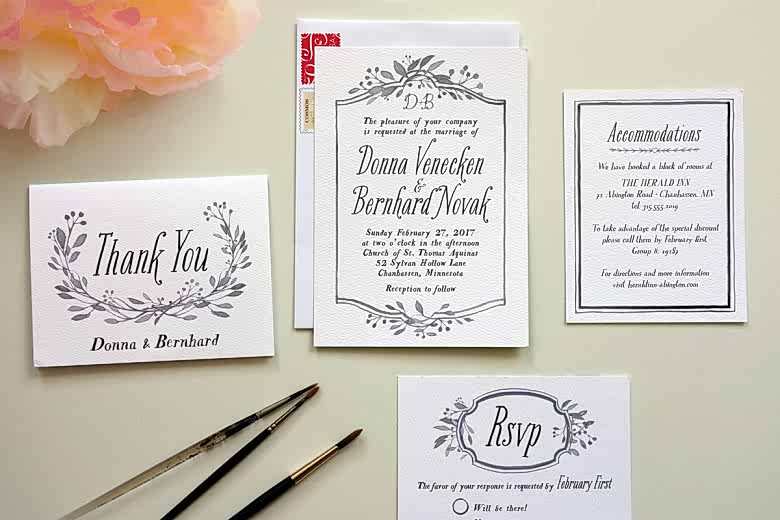
RSVPS: Whether you choose to include a card for your guests to drop in the mail, a phone number to call, an email address to reply to, or a website to visit in order to collect your RSVPs, prepare yourself to have to hunt down more than a few people, regardless of your chosen method. We saved paper by only sending physical RSVP cards to our older guests (i.e., those who do not, and never will, own a computer or a smart phone) because we knew we’d have to chase down responses anyway. So we saved a little bit of money where we felt it might be thrown away otherwise. Here are a few more tips for collecting RSVPs.
Have fun, and happy printing.
(And obviously, if you designed or printed your own DIY Wedding invitations, share a picture in the comments, stat!)